Patient instructions for use
Step-by-step guide to setting up and using your DormoVision X™ sleep study system at home
Watch the full setup video
Follow along with this step-by-step walkthrough showing how to set up and wear DormoVision X™.
Device setup
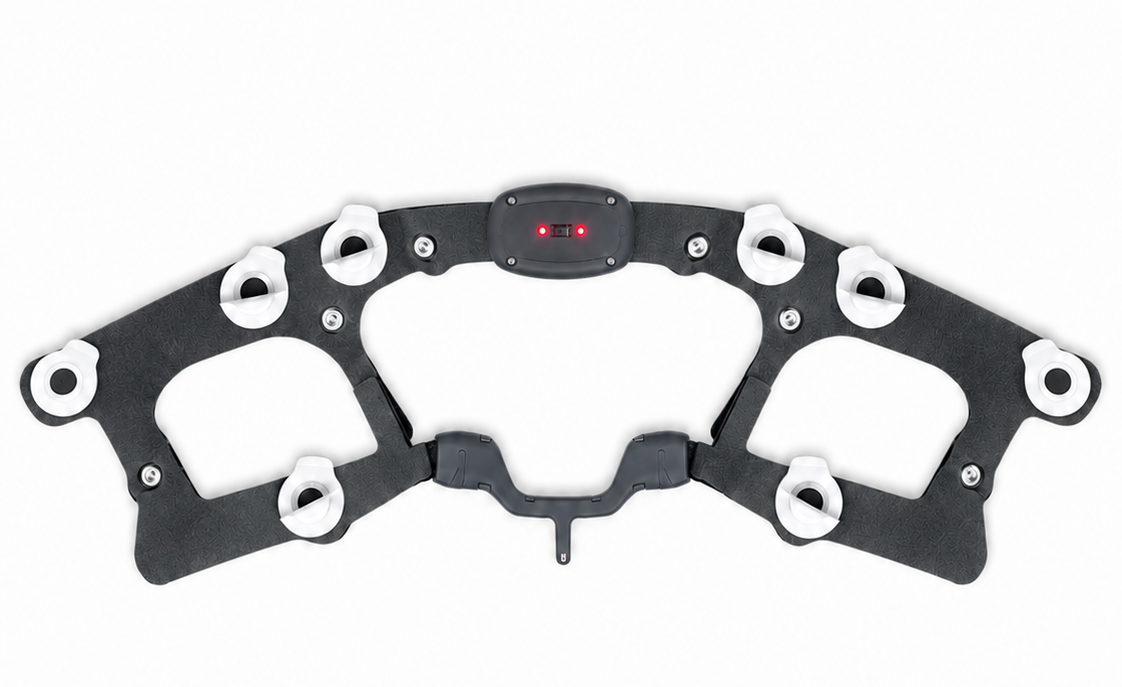
Attach electrodes
Open the electrode package and attach 12 electrodes to their points on the head unit. If your kit includes the leg unit, attach 3 additional electrodes to it in the same way.
Starting the test in the app
Download the app
Download the "Dormotech" app from Google Play or the App Store.
Grant permissions
Open the "Dormotech" app and grant permissions as requested.
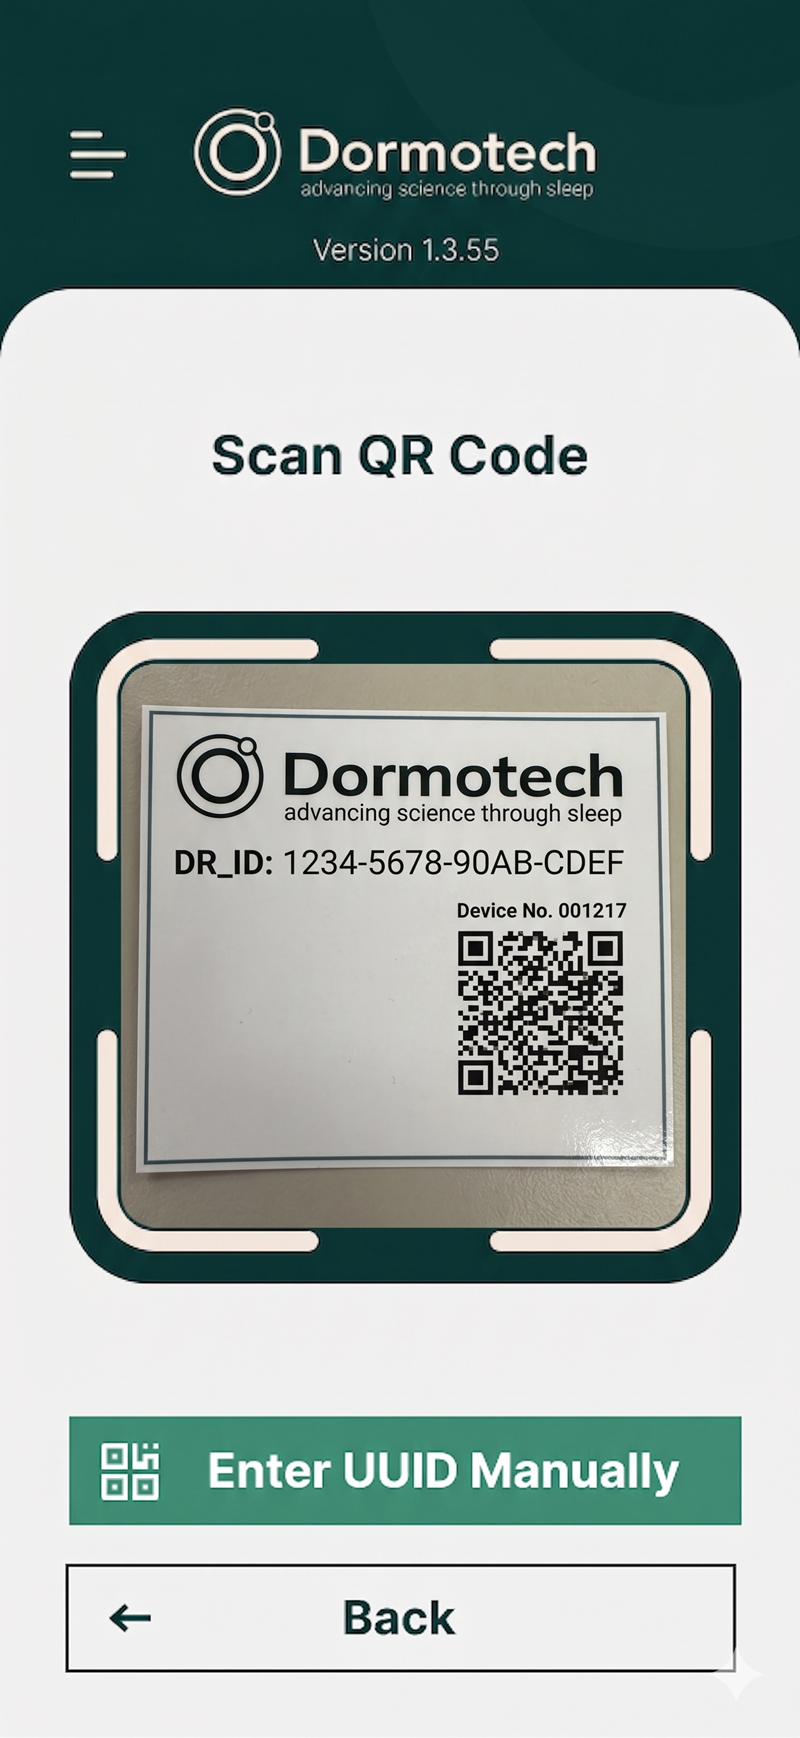
Scan QR code
Scan the QR code on the provided card within the DormoVision X™ box. After the app indicates a successful connection, tap Next to continue.
Complete the app questions
Answer all 6 questions in the app. Tap Next after each question, and once again after the last question.
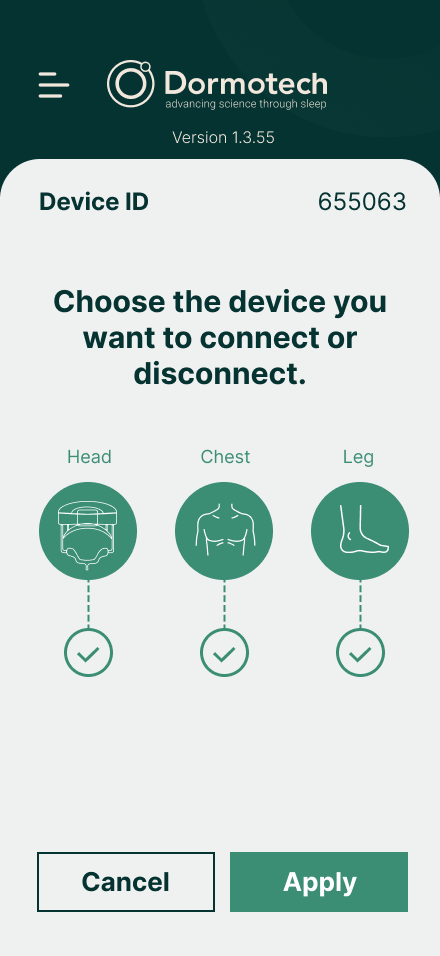
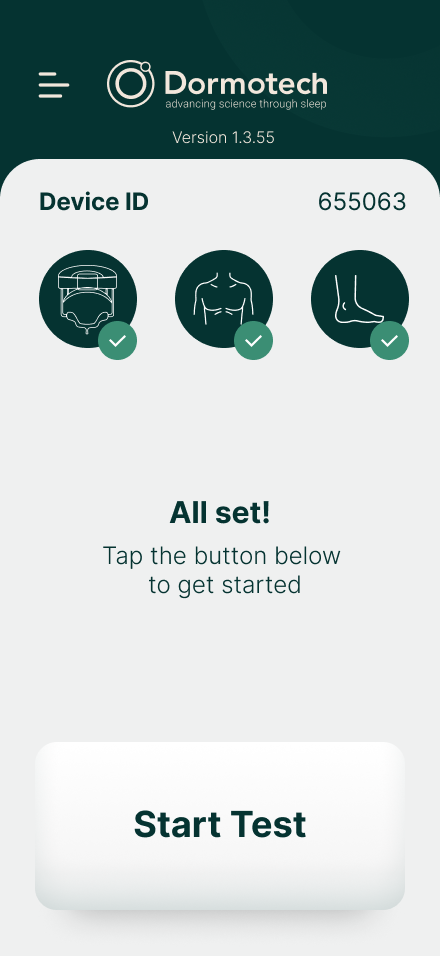
Choose your units
Choose the units in your kit: Head Unit, Chest Unit, and/or Leg Unit. Then click "Apply".
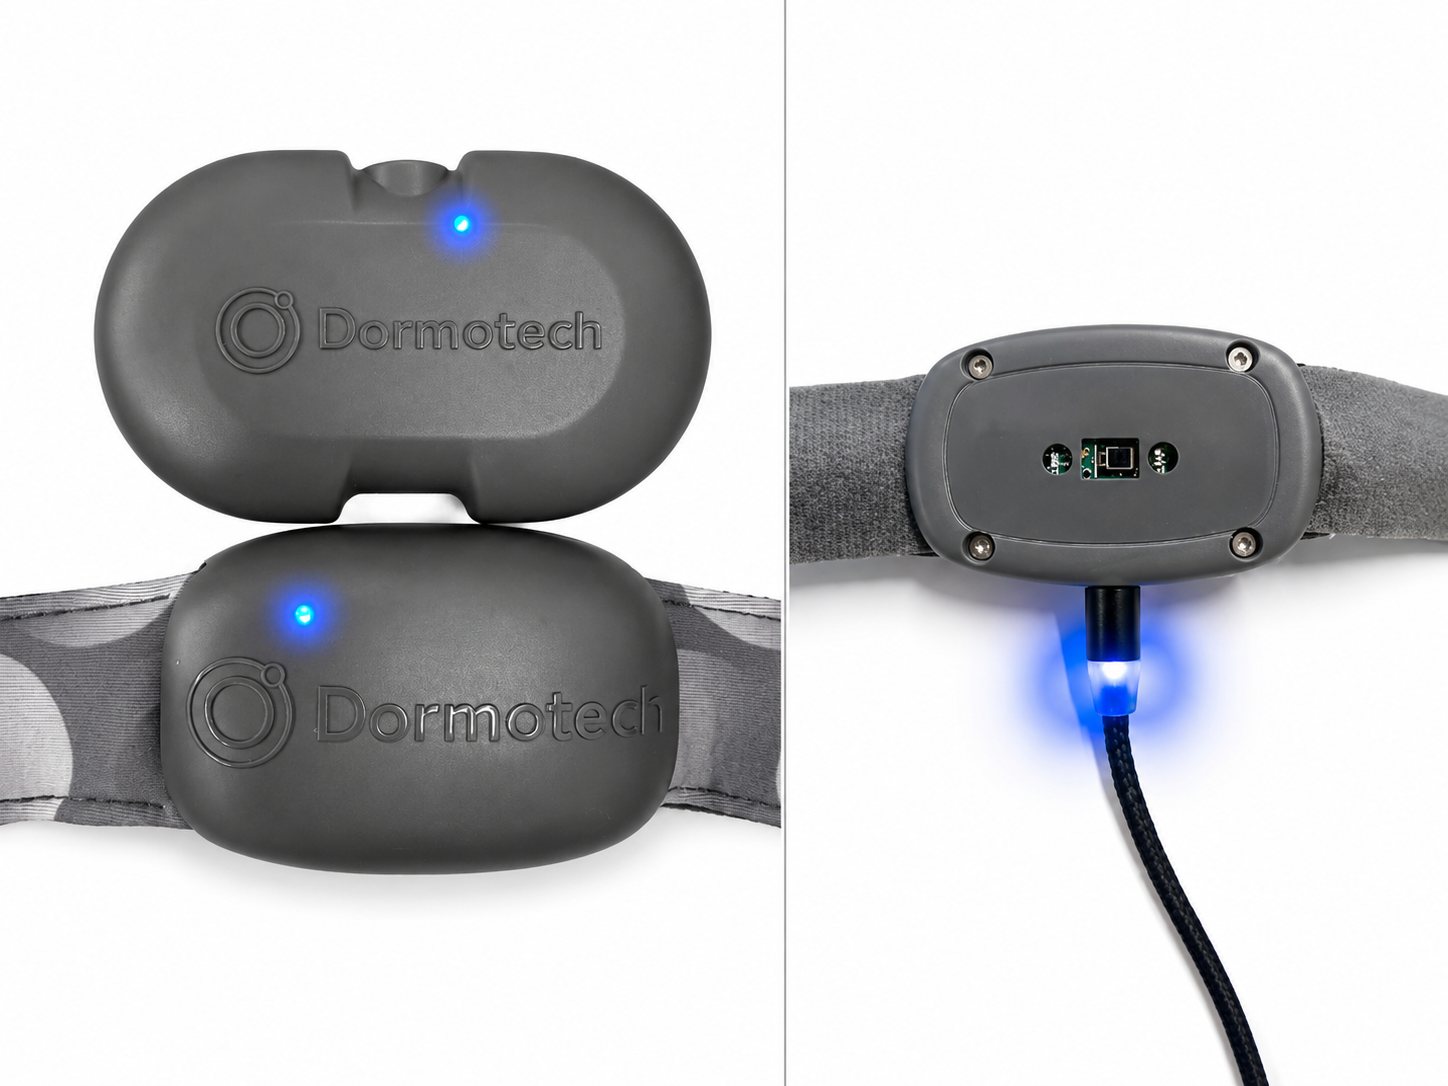
Power on
Plug the USB cable into a power outlet. Connect the magnetic charging cable to the Head Unit once, then disconnect it. Wait a few seconds until the app confirms the unit is connected, then tap Continue and repeat for each selected unit.
Wearing the head unit
Remove protective layers
Remove the protective plastic layer from all electrodes.
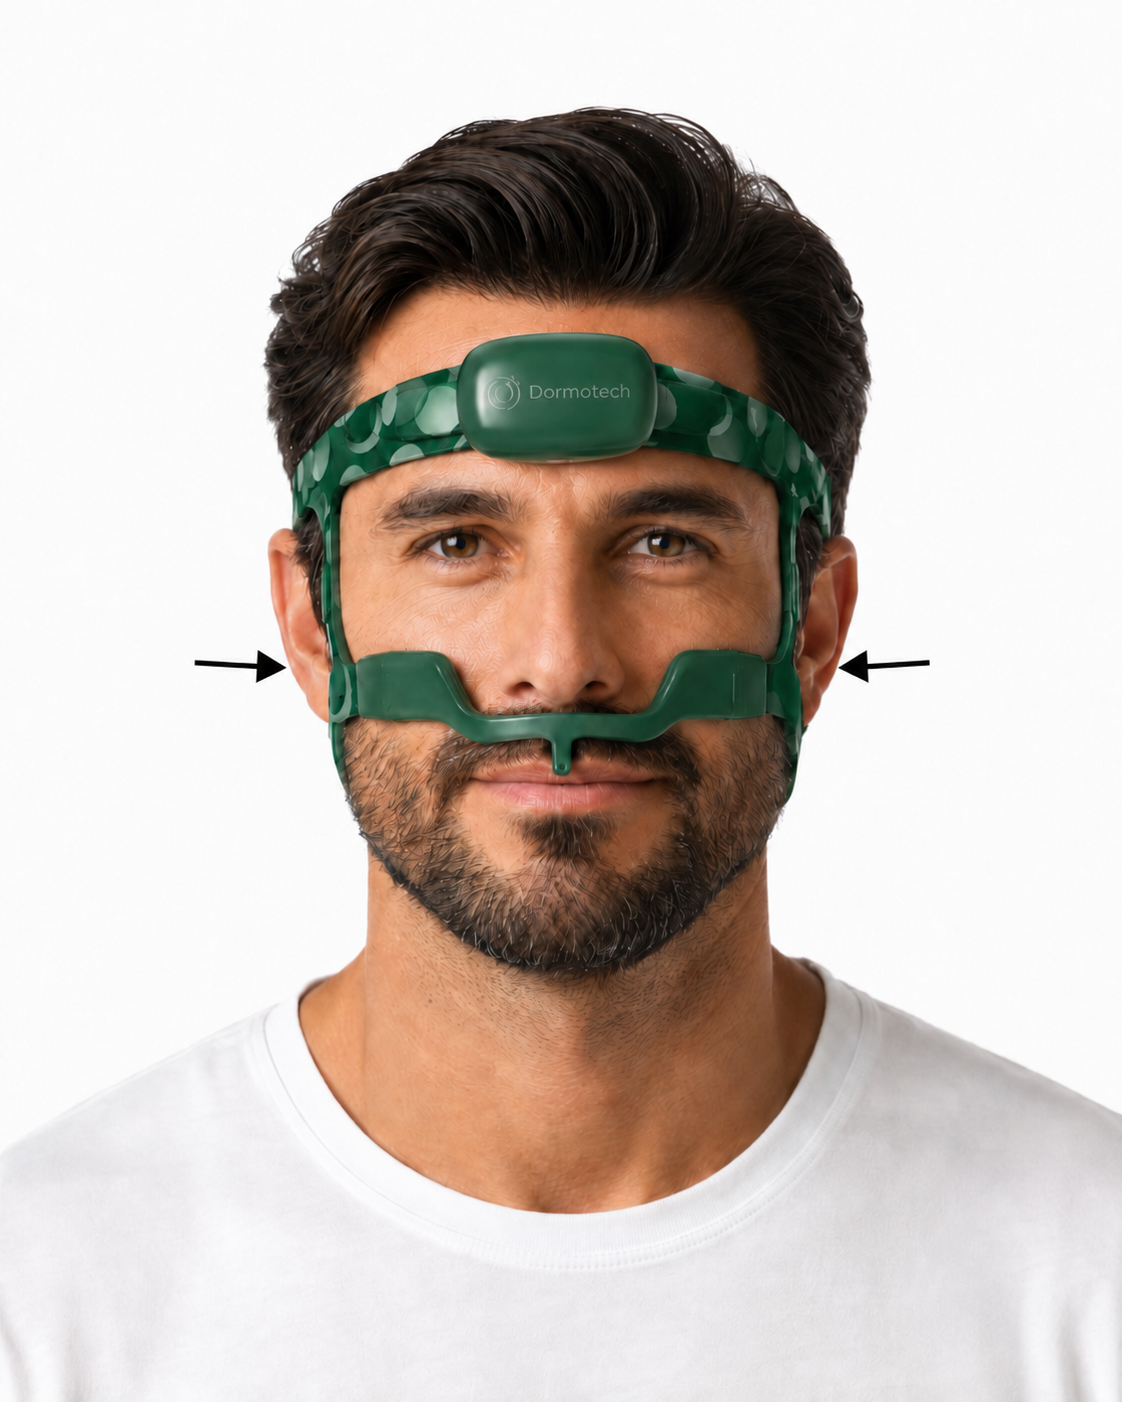
Position and fasten the head unit
Place the Head Unit centered on your forehead. Fasten the top strap so the electrodes touch the skin, not the hairline. Fasten the bottom strap so the rear electrodes sit behind your ears against the skin, not hair. Keep the straps secure but comfortable; do not overtighten.
DO NOT overtighten the head unit or straps. Excessive tightening may cause localized pressure against facial structures and result in discomfort or skin irritation. Adjust the straps to ensure secure contact with the skin while maintaining comfort.
Adjust nose section
If needed, adjust the height of the nose section so it sits comfortably between the nose and mouth, using the side straps located on the cheekbones, as shown in the image. Make sure the nose piece is positioned comfortably and does not block breathing.
Secure the electrodes
Apply gentle pressure to the electrodes to ensure they are securely attached to the skin.
Wearing the chest unit
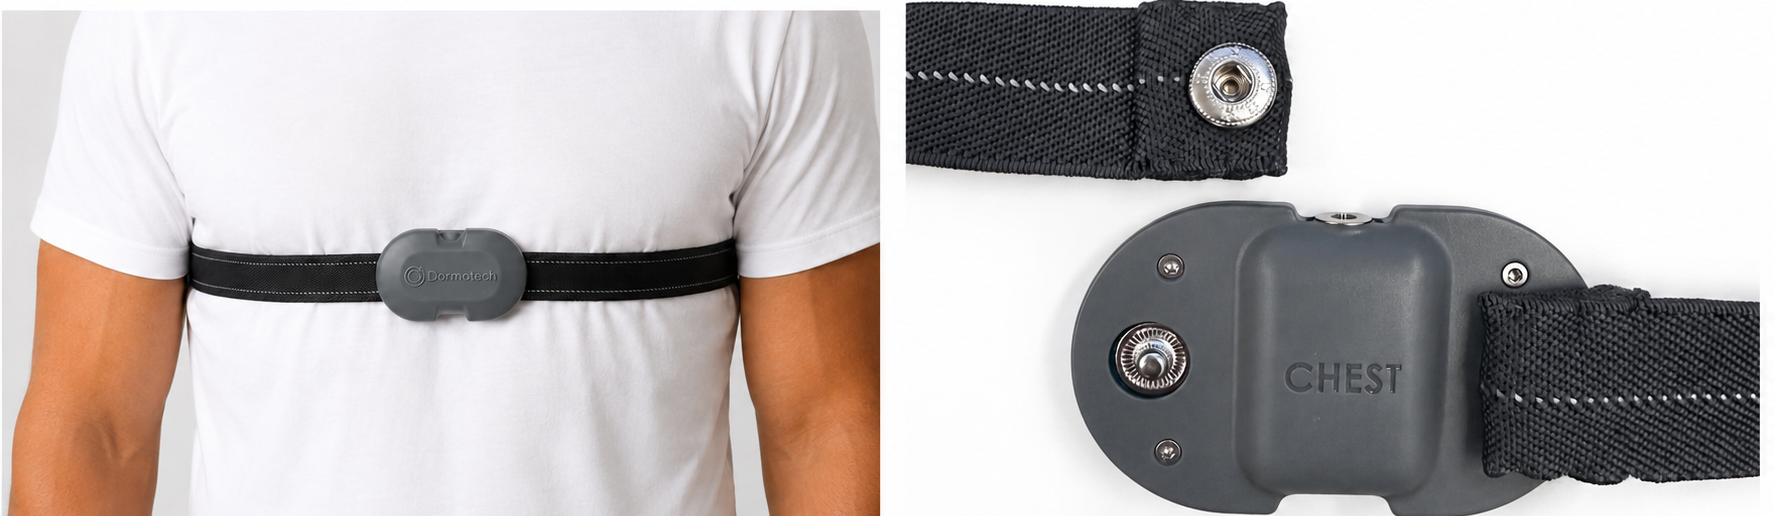
Position the chest unit
Position the Chest Unit at the center of the thorax, on top of the clothing. The label should be readable by a person standing in front of you, and the magnetic charging connection should face upward toward the head.
Secure with belt
Snap one end of the Chest Unit into the metal button on the chest strap. Wrap the strap around your chest and connect it to the remaining metal button. Adjust the strap so it fits securely and comfortably — a secure fit helps ensure optimal performance during use.
Wearing the leg unit
Position the leg unit
Remove the plastic covers from the electrodes. Position the Leg Unit on either lower-leg side muscle, as shown in the image, then wrap the strap around your leg to ensure the electrodes are firmly secured to your skin.

Starting the test
Tap "Start Test"
When you have reached the last step in the app, tap "Start Test." At this point, your sleep study is now live.
DO NOT close the app during the recording. You may minimize the app and turn off the screen.
Keep phone nearby
Make sure the phone used for the test is charged and stays in the same room with you throughout the sleep study.
When you wake
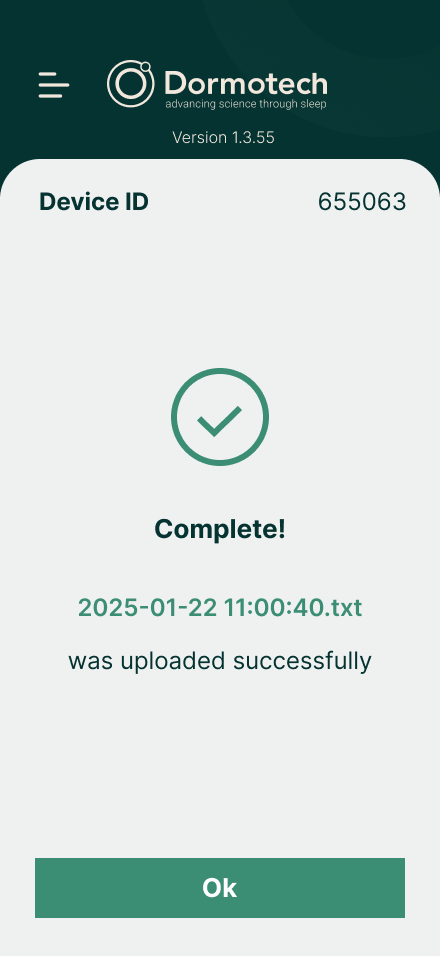
In the morning, tap "Stop Test" in the app, then remove the unit(s).
Wait about one minute for the data to upload, and close the app only after the confirmation message appears.
Frequently asked questions
No. DormoVision X™ is designed to be gentle and lightweight. Most patients find it comfortable within a few minutes. The sensors are soft and the device causes no pain, though you may feel slight pressure from the respiratory bands.
Absolutely. The device is designed for natural sleep in any position. Move around as you normally would — the sensors will maintain contact with your skin.
Let your clinic know before your study. We have hypoallergenic adhesive options and alternative electrode placements that can help. Most skin irritation is temporary and resolves within hours.
No. The device is not waterproof. Remove it before bathing and do not submerge it in water.
Most studies are scored and reviewed within 2 to 3 business days. Your physician will contact you with results and any recommended next steps.
Yes. Keep the phone used for the test in the same room with you during the night. Don't close the app while it's recording — you can minimize it and turn off the screen.
In the morning, tap "Stop Test" in the app and remove the unit(s). Wait about a minute for the data to upload, and once you see the confirmation message you can close the app.
No. If you wake up briefly during the night, do not remove the device and do not stop the test. Leave the device on and continue the recording. Only stop the test in the morning when you are finished sleeping.
If you encounter any issues, contact your technician for help.